The Motorola MOTOTRBO™ DM4600 was designed for the commercial radio market being ETSI DMR Standard Compliant and delivering really high class audio on both transmit and receive. It is packed with features, many of which one would not use in the general day to day amateur use. There are two versions available which operate on either UHF or VHF with either a high power 45 watt version or low power 25 watt version.The DM4600 may be programmed on both DMR and Analog FM. Whilst these transceivers and their accessories do not come cheap, they are well worth the money.

It should be borne in mind that the programming of a Motorola Radio is no more difficult than any other radio available to amateur use. There are a number of features designed for commercial use that are never used and these can be ignored or swiched off.
Bear in mind that:
1) It is not possible to swap codeplugs, leads or software between Motorolas and other radios.
2) High power DM4600 codeplugs can not be written into a standard 25w DM4600 codeplug.
3) If you obtain codeplugs from somebody else they may have mistakes in them.
4) Until you become "Expert", program one zone at a time, and get it working, before proceeding to the next one.
Step by Step Programming: Follow the procedure below
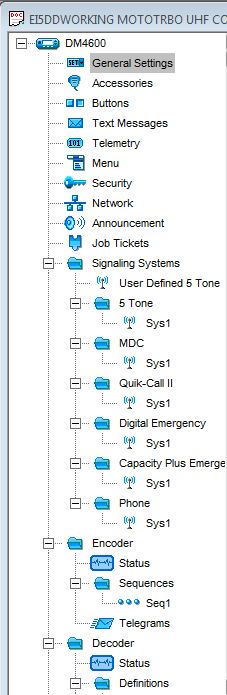
General Settings
As with most CPS Software the menu is found in the left hand coloumn
The menu
Under General Settings, fill in the Callsign and your unique DMR I/D. It is possible to change the Logo on the startup screen. In our case the Motorola Logo is the default.

Contacts
By right clicking on "Digital Contacts", a drop down menu appears with "add" and options such as "Group Call" or "Private Call" may be selected. a Talk Group, Reflector or Callsign may be added with its appropriate Call I/D

Edit this part of the frame - the Callsign can be replace Call 1 as shown and the figure 1 to the right maybe replaced with the Talk Group number or, in the case of an individual Callsign, enter the individual's DMR I/D number.
Zone
Unlike other radios, it is necessary to create a Zone to accommodate channels first. Scroll down to Channels from the menu on the left. Right Click on "Channel" - a drop down menu "add" will appear and hovering over this, the word "Zone" will appear so click on "Zone".

Having created the zone, scroll down to the bottom of the list where the new Zone will be found. By Right clicking over the New Zone a drop down menu will appear with a few choices. First select Rename to give the Zone the appropriate name for its contents. It is also possible to select "add". By left clicking on the word "add" channels will appear in the list as shown below. It will be necessary to choose between digital or analog channels at this point. Four Digital Channels have been added below. Digital Channels are listed with a small blue square wave in front of them. Analog channels are indicated by a the upper half of a sine wave.

Channels
Lastly, it is necessaty to assign names, frequencies and details to the channels. Firstly, right click on the channel listed a drop down box will have a few commands but use rename.This will allow the channel to be renamed to your choice. Double click on the renamed channel and the box below appears. This is only the top half of the box and the only information required here is the colour code and Repeater/Time Slot information. There is no need to change anything else in this section, Scroll down further.

Having scrolled down further the second alf of the box requires careful programmning. The box on the top left requires the RX frequency to be filled in and then the TX frequency in the box on top right hand side.
Moving down, fill in a contact name from your list. Set the power level to high or low. Time out timere TOT should be set to no more than 180 secs as most network components time out after 3 minutes. Retry Delay remains at zero. Admit criteria should be set at "channel free" with In Call criteria set to always. Any other boxes not mentioned should be left alone.

Here is an example of a completed channel

Having completed a few channels it is possible to add channels as required using the same sequence illustrated above.
There are many other parameters that one will come across and if it is uncertain what they do, leave them alone. However those listed below may be modified:
Talk Group Hang Time adjustments should be set to 1000 or 2000
Sign in/sign out - not used
Test Mode - not used
ARTS - not used - disable ARTS Tones
There are no noise or squelch tails on DMR Repeaters
The Motorola can generate its own channel free indication tone so handy to have it switched on
A
handy tone is the talk permit tone and can be set to TX on FM DMR or
None - always handy to have this switched ON in case the mic is
accidently keyed
Set Expert mode on
Volume offset is the tone volume
ARTS basically beeps the set when a valid transmission is received
IMPORTANT
The
Radio Enable and Disable and its associated decode options like remote
monitor and Radio Check should all be unticked. Unlikely as it may be
you don't want to accidently Stun, Disable or Kill somebody elses or
your own. It is a complex problem to un-stun a radio. Beware!
Probably only want EDIT and Test messages ticked in Contacts
SCAN - by ticking these options enables one to directly add and remove channels from the scanlist on the fly,
Channel config window
allow talk around
IP site connect is only on DMR-Repeater Channels
Compressed UDP Header untick for wider compatibility
Emergency settings should all be off
TOT should be 180 secs
Enable TX interupt allows stuck PTTs to be unkeyed remotely
TX interruptable frequencis OFF
Private calls confirmed - unticked
data call confirmed - Disable
Enhanced channel access - untick
CSBK Data - untick
The Accessory Socket
The accessory socket on the back of the DM4600 provides excellent facilities.

The original plan was to fit an external speaker by using pins 9 & 10 but, on further examination, extracting line level audio from pin 14 and ground pin 16 made it possible to connect into the Auxillary Input on the car radio to give high quality audio from the car speakers. The level can be adjused on the car radio itself making life easier.
A bluetooth adaptor to run a handsfree headset could be fitted via this socket.